Hiding The Chaos
What are the two main categories of merchandise filling stores in January?
#1-Fitness/Weight Loss paraphernalia (not touching that one)
#2-Organizational containers of all sizes
So why do we have the need to buy storage bins after Christmas? Because we have too much stuff! Yes, I am guilty. A LOT of what we have, though, is Christmas decorations, bins and bins and bins of them taking up space in the garage. (We also have 19 Christmas trees hibernating in the attic.) But today I am going to tell you our solution to hiding all of the plastic tubs that hold our seasonal bits and bobs.
Admittedly, we have a big garage, three bays. But it's not the width that makes it awesome, it's the height which is about 15'. But even homes with normal ceilings can do a version of this idea. In fact, I got the original thought from my big brother who built a short loft that the hood of his Suburbans slid under just perfectly.
When I started Chics With Tools, we decided to build upon that idea and invested in building our own storage loft. Below it I keep tools and on top it is pretty much all decorations.

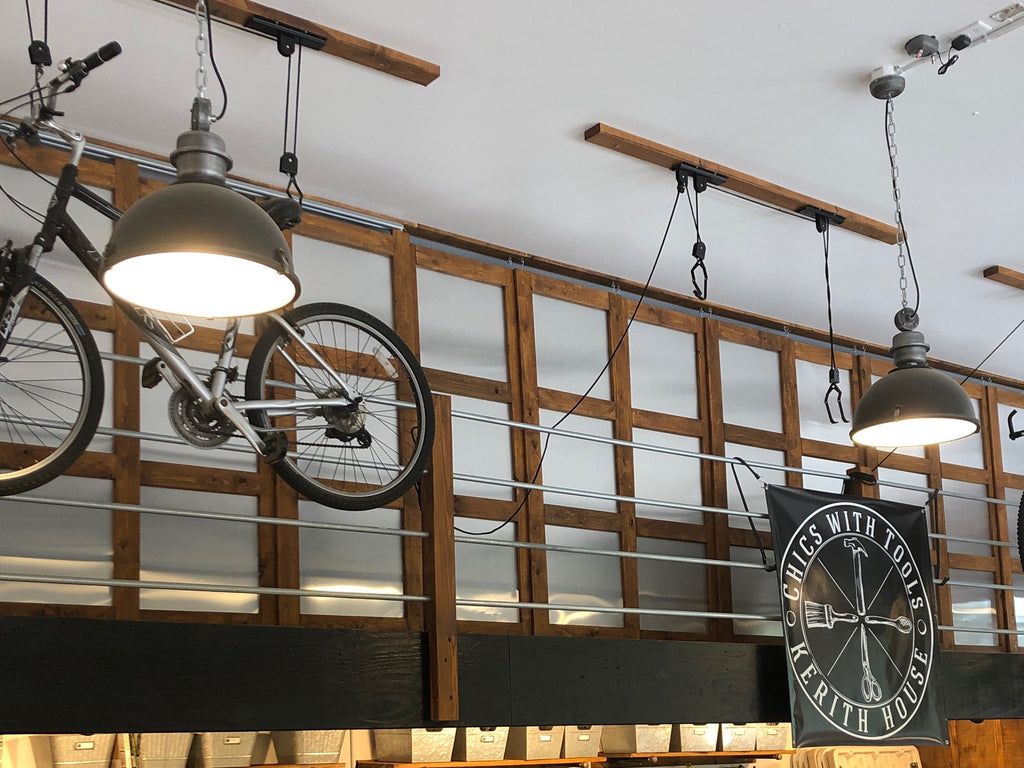
To make the loft aesthetically pleasing, though, I built doors out of cheap 1" x 4"s and aluminum flashing, creating an industrial vibe. Since this space is only accessed twice a year, making the doors slide was not necessary, except for one end. This saved a good bit of money.
I have used this same basic technique for the "shed" part of our garage and also my eldest son's closet, shown below. In both cases, however, I made them slide and I also used metal hardware instead of pocket screws. But that's for another blog.


Even with the current crazy cost of lumber, this is an inexpensive way to make something really cool and functional. Here is how I went about making these doors and you can too.
TOOLS AND MATERIALS:
1" X 4" lumber
Aluminum flashing
Kreg Jig and Screws
1/2" screws
Gloves
Metal Shears
Drill
Saw
Deck Stain
Cup hooks and screw eyes
DIRECTIONS:
Measuring-To determine how many doors you will have and the width of each, first measure your space.
Use the width of your aluminum flashing as a guide. I wanted to make as few cuts and have as little waste as possible so I did some calculating to determine the door width. Also, I accounted for the doors to overlap one another.
For the height of the doors, I made them short enough to not scrape the floor and have enough space at the top to allow for hooks and another 1" x 4" attached to the ceiling.
The number of cross pieces you have will be determined by how you lay out your aluminum flashing. You need some pieces just for stability.
Cutting - Using a miter saw, first cut sample door pieces to make sure your dimensions are accurate, then repeat.
Also, cut more 1" x 4"s to attach to the ceiling where you want the doors to hang.

Using a Kreg Jig and drill, make pocket screw holes on the back side of the cross pieces.

Mark where they will attach to the vertical pieces. Assemble all of the door frames.


Comments on this post (1)
This storage system is brilliant and looks beautiful in your garage!
— Jane Schaepe